These instructions explain how to create and run GLUT applications in the computer labs using Visual C++ 6. Some instructions for installing and using the GLUT and OpenGL libraries for personal computers or computers without the proper files installed can be found here.
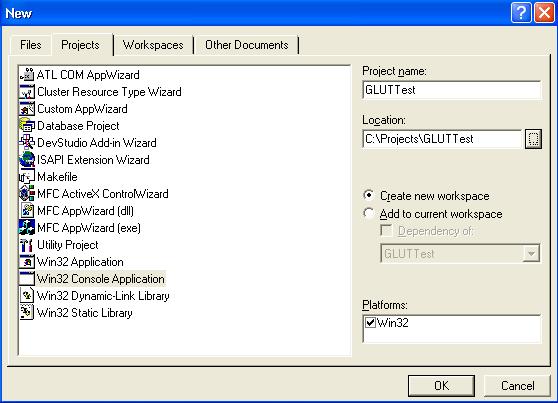
When creating an OpenGL\GLUT application, no OS code is required since everything is, conveniently enough, handled by the GLUT libraries. When using Visual C++, the best way to start is with a bare-bones Win32 Console Application. Selecting File > New will allow you to create a simple Win32 Project.
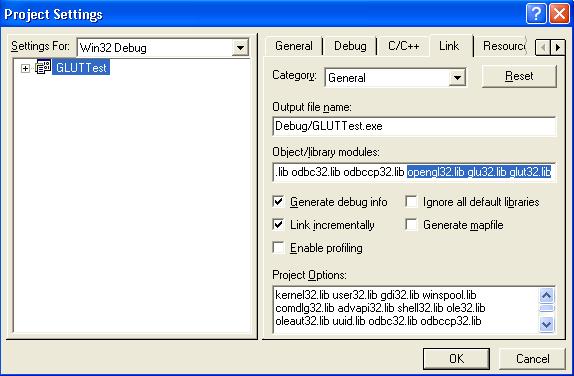
Give the project a name and location and select the default settings from then on. You'll be faced with a blank Visual Studio project. The only thing necessary to compile a GLUT application is to link to the necessary libraries. These are OPENGL32.LIB, GLU32.LIB, and GLUT32.LIB. Select Project > Settings and move to the Link tab. You can attach the necessary libraries at the end of the modules list as highlighted below.
Finally, when creating your source and header files, make sure to include the <glut.h> header file. This header includes all other necessary headers required to use OpenGL in windows. In order to avoid conflicts between header files, you should make <GL/glut.h> or <glut.h> the last header file you include - if it's listed before others, it sometimes will give an error about function redefinition.
